What is Unique about Film?
Studio lighting has been popular since the dawn of photography. North facing windows, flash powder, incandescent lamps, and most recently, electronic flash photography. People have been very successful with these techniques over the years and you can be too.
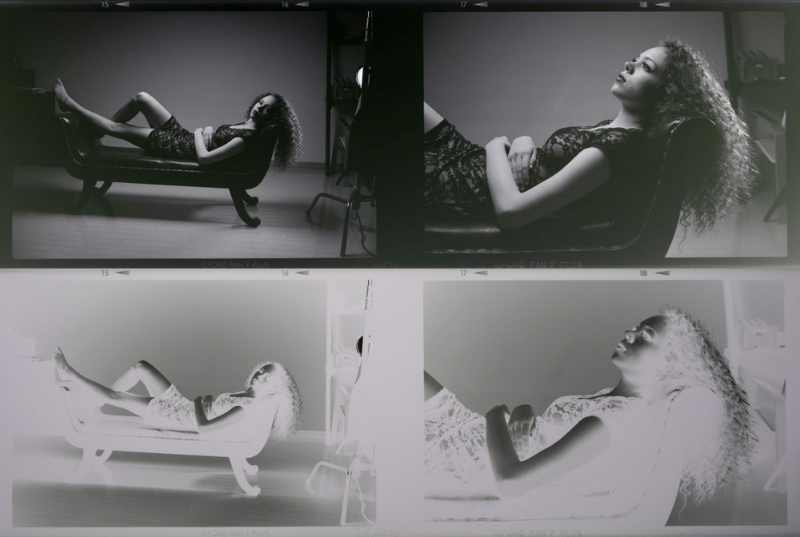
A snap of a negative from the light table (below). The negative was also inverted (above) in photoshop to give an idea what the final print would look like. Ilford Pan F Plus.
With film, the obvious limitation is the lack of instant preview. In truth, many of the best film photographers of the past would use polaroids to ensure their photograph would turn out exactly how they wanted before capturing the image on film. Their job was to come back with great photographs, not to challenge themselves with a blindfold. You may not have access to a polaroid back but I am willing to bet that you do have access to instant preview. Don’t feel guilty about taking advantage of this, it has long been an accepted practice. All that said, let’s continue with only a mechanical film camera and a light meter in our bag, and of course, lights on our stands.
Older technologies had additional features to make up for their limitations. Many of these have sadly evolved out of cameras as they have been replaced with newer technologies. Large focus screens with split-prism finders have disappeared with the advent of auto focus. Depth of field scales have disappeared with the introduction of zoom lenses. Modeling lamps are on the decline due to the proliferation of small speedlight flashes. A modeling lamp is a low power lamp inside a studio strobe flash head. Its purpose is not to add exposure, but to help the photographer visualize what the light is doing. These lamps help to show where the light is falling but not necessarily the power level of the light, depending on the model. When you use more than one of them together, keep this in mind. In summary, to help with visualization, it is best to choose a technology that allows you to preview the image in real life as a film photographer of the past would have. Speedlights are becoming an increasingly popular tool for studio lighting, however their lack of a true modeling lamp is a large handicap to the film photographer.
Color is another aspect that was dealt with differently on film. Your studio light may come from a window, a tungsten lamp, a fluorescent lamp, studio strobes, etc. There are many tools to help deal with the different color temperature of these different light sources. Most film is daylight balanced. It was designed to work with the sun or daylight balanced studio lighting. Tungsten film is also available and has been designed to work with the orange light of incandescent lamps. Assuming one wants to work with daylight balanced color film, there are a few different options available to match the lighting color temperature to your film color temperature. One can use color correction filters attached to the camera lens that shift the color of the light striking the film. Be careful to apply the correct increase in exposure to make up for the light absorbed by the filter you are using. Another option is to put a color correction gel over the light source. The final option, available to the modern film photographer, is to correct the color in post-production. This option is also available in a color negative enlarger head. If you plan to correct color in post, it is strongly advised to take a photo of a white balance card under your lighting conditions on the same roll of film as the rest of your shoot. Cards with black, grey, and white are more powerful tools for color correction than a simple grey white balance card. Further details on color correction filters and post processing are beyond the scope of this article.
Negative film is thought to have a very wide exposure latitude and positive film, very narrow. While this is true, it is important to keep in mind that the range of tones must be able to be printed so I recommend to keep the image within a reasonable contrast range. As a rule of thumb, using an incident light meter, don’t overexpose any part of the image by more than 1 stop and any areas that are more than 3 stops underexposed will begin to fade to black. With a spot meter, the range is approximately from 3 stops underexposed to 3 stops overexposed, which approximately translates to from pure black to pure white. When working at the extremes, it is helpful to be familiar with your particular film.
Double check your settings! You don't want to find out when it is too late that you had the wrong ISO dialed into your light meter or the wrong shutter speed or aperture dialed into your camera. If you have a rangefinder or TLR, take the lens cap off!
Metering the Light
Metering is the most technical part of studio lighting. Having a firm grasp on the science of metering will enable you to forget about the technical aspects and focus on the art that science creates. For studio lighting I recommend using an incident light meter. The incident light meter measures the amount of light falling onto your subject. In-camera meters are called reflected light meters. They measure the amount of light reflected from your subject. With a particular light setup, an incident light meter will always read the same exposure. A reflected meter will read different exposures depending on how bright or dark your subject is. While using an incident light meter, you tell it the ISO and shutter speed or aperture you want to use. You then measure the particular light you are interested in. The meter then reads out the proper third piece of the exposure triangle, be it aperture or shutter speed. Because I use flash I always set the ISO and shutter speed. The meter then reads out the proper aperture. I adjust the power of and re-meter my strobes until the meter reads the aperture I want to be shooting at. Some photographers spot meter, using the zone system in the studio. This method works as well however it is more difficult to master. Whatever meter you use, when using flash, you will need a meter that has the ability to measure flash. The images below show a light meter and that meter in action.

Sekonic light meter featuring incident and spot metering capabilities for flash and/or continuous light.

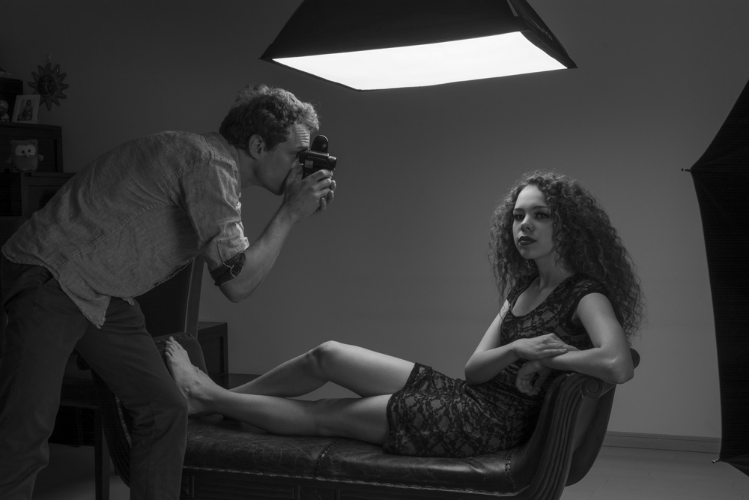
Using the incident light meter. The main light is a softbox as seen in the upper right of the frame. The umbrella which is switched off in this image. The umbrella is used as a fill light later on.
Using the spot meter is an alternate metering method that can be used. The spot meter can be a better tool than an incident meter when the lighting is uneven or unusual in some way. It is also useful for metering the background.
Lighting Ratios
A typical studio setup consists of a main, also known as key light, and a fill light. The simple approach is to set the power of the key light to proper exposure, according to the incident light meter. The fill light is then set to a lower power. With only a key light in operation, the shadows on the subject will be black and lacking all detail. A fill light can be turned on to ‘fill in’ these shadows with detail. A fill light coming from the same location as the camera will fill in all shadows evenly. The fill light can be provided by another lamp or by a reflector. In a small room with white walls, the walls will act as a reflector whether you want them to or not so be aware of that. A black ‘reflector’ can be used to maintain dark shadows if that is desired. When using a reflector, it needs to be on the other side of the subject from the main light in order to catch that light and bounce it back into the shadows. The shadows help define the mood of your photograph. Having no fill light leads to a dark mood and having a lot of fill light leads to an airy mood. Here is the breakdown by mood, as metered by the incident light meter, in stops below the main light:
Fill light -1 stop: Airy
Fill light -1.5 stops: 3D studio feel
Fill light -2 stops: Dark studio feel
Fill light -3 stops: The contrast ratio of a sunny day
Fill light -4 stops: Nearly black shadows
When you meter the shadows, aim the incident meter toward the fill light, making sure to block the main light off of the meter so you get a correct reading for only the fill light. When using flash, the first meter reading should be with the flash off. If you plan to have a flash-only exposure, that initial ambient light reading should be more than 3 stops underexposed to ensure that the ambient light does not affect your photograph. Next move on and meter the lights you have set up. Two separate methods of creating fill-light are shown.

Using a foam core board as a reflector to add fill light. All of the light is coming from the softbox in the right side of the frame. The umbrella is switched off in this image.
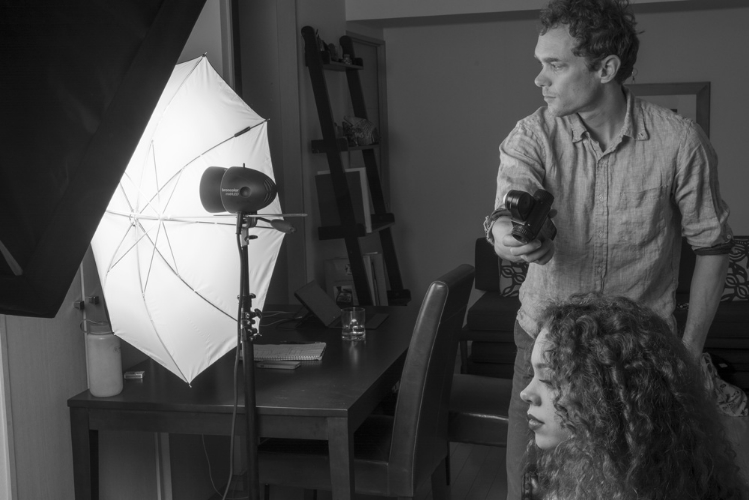
Metering the umbrella, which is being used as a fill light in this instance. The main light is the softbox that is seen in the upper left corner of the image. The main light would typically be blocked from the meter while I meter the fill light but I wanted you to see the meter in this image.
Light Modifiers
A small light source creates distinct shadow edges. A large light source creates feathered shadow edges. Many studio photographers prefer the softer light provided by a larger light source. Some of the options to enlarge the light source include umbrellas, softboxes, bouncing light off of a white wall or ceiling, using a window (no sun visible) as a light source. There are so many ways that you can research. You can often deconstruct a photograph by looking at the catch lights created by the light source in the eyes, as seen below.

100% crop. You can see the square catchlight of the softbox light modifier in the eye. Ilford Pan F Plus.
Accent and Background Lights
Additional lights can be added to accent hair, a product such as a purse, etc. These are called accent lights. An additional light can be used to illuminate the background which will give you control over how the background looks. If you want total control of the background, put a lot of distance between the subject and background. This will enable you to control the background and your subject independently if you have multiple lights.
Flash Sync
Syncing your camera to a flash unit can be achieved many ways. The simplest is a PC sync cord. This attaches to a PC port or the hotshoe if you do not have a PC port on your camera. You can get more advanced with wireless remotes such as a PocketWizard that clips into your hotshoe.
If you are shooting flash, it is critical that you know your camera’s flash sync speed, also known as x-sync. You must shoot at this shutter speed or slower. If you shoot faster than this speed you will get a black band or even no flash exposure in your frame. You will not find out until you get your film developed and your shoot will have been ruined. Leaf shutter cameras sync at all speeds.
final images

1 light setup. Softbox placed to camera right. No fill light. Note the deep shadow in the camera left side of her face. Ilford Pan F Plus.
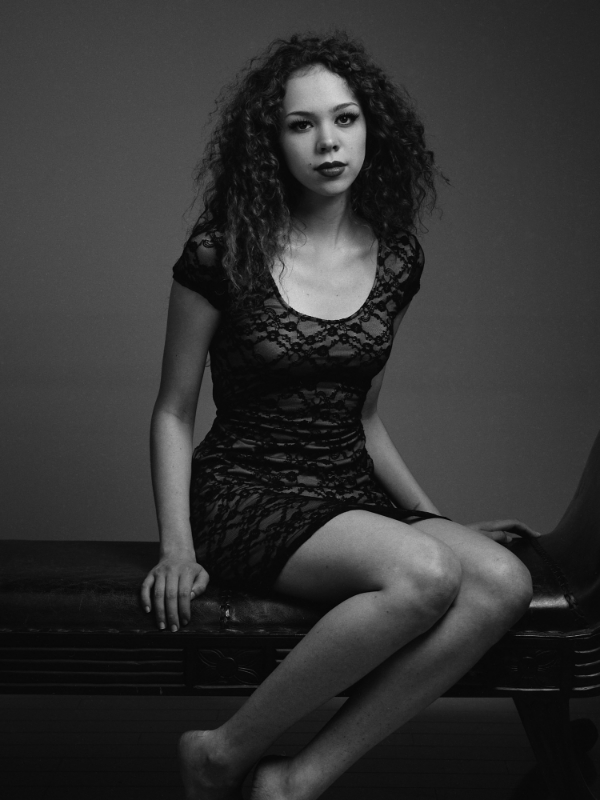
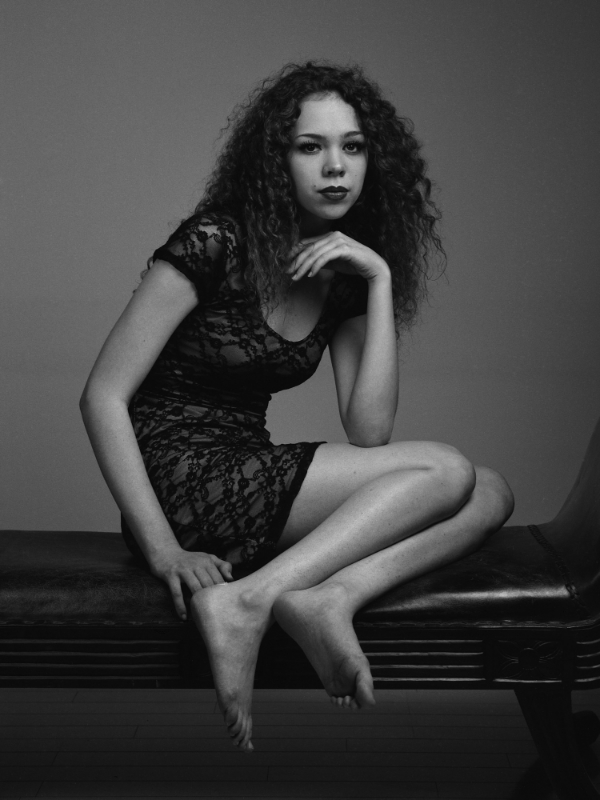
1 light setup. Softbox placed to camera right. White foamcore board used as reflector to camera left. Ilford Pan F Plus.
2 light setup. Softbox placed to camera right. Umbrella placed just to camera left for fill light. Ilford Pan F Plus.

2 light setup. Softbox placed above model, aimed straight down. No fill light. Hair light placed behind model, camera right. Ilford Pan F Plus.
Article and photography by: Mark Schlocker
Behind the scenes photography by: Melissa L
Modeling by: Madison Lindfors