The word cave brings up many meanings such as a dark space or a man cave. It can also mean a commercial or tourist cave, but to the cave explorer the word instantly brings back memories of the last trip. Caves, along with the deep oceans, are the last unexplored places on our planet. There are many reasons to go underground, such as scientific research, mapping, exploration, photography, and of course fun and adventure.

If you have never been underground, and do not have claustrophobia, start with the tourist caves. There are commercial caves located in every part of the world where the rock layers allow caves to form. The commercial caves are usually the best examples of the large caves for the tourist to see and enjoy. They are well worth a visit and in some cases worth seeing many times.
The other caves are known as wild caves and are undeveloped. There are tens of thousands of caves on planet Earth and many are unexplored. Anyone interested in exploring a wild cave needs to do so with expert cave explorers. In the United States the best way to find experienced cavers is through the National Speleological Society listed on the Internet as NSS.org. Look on the internet for the area of the world you live in and begin to make contact. You will find a wealth of information.

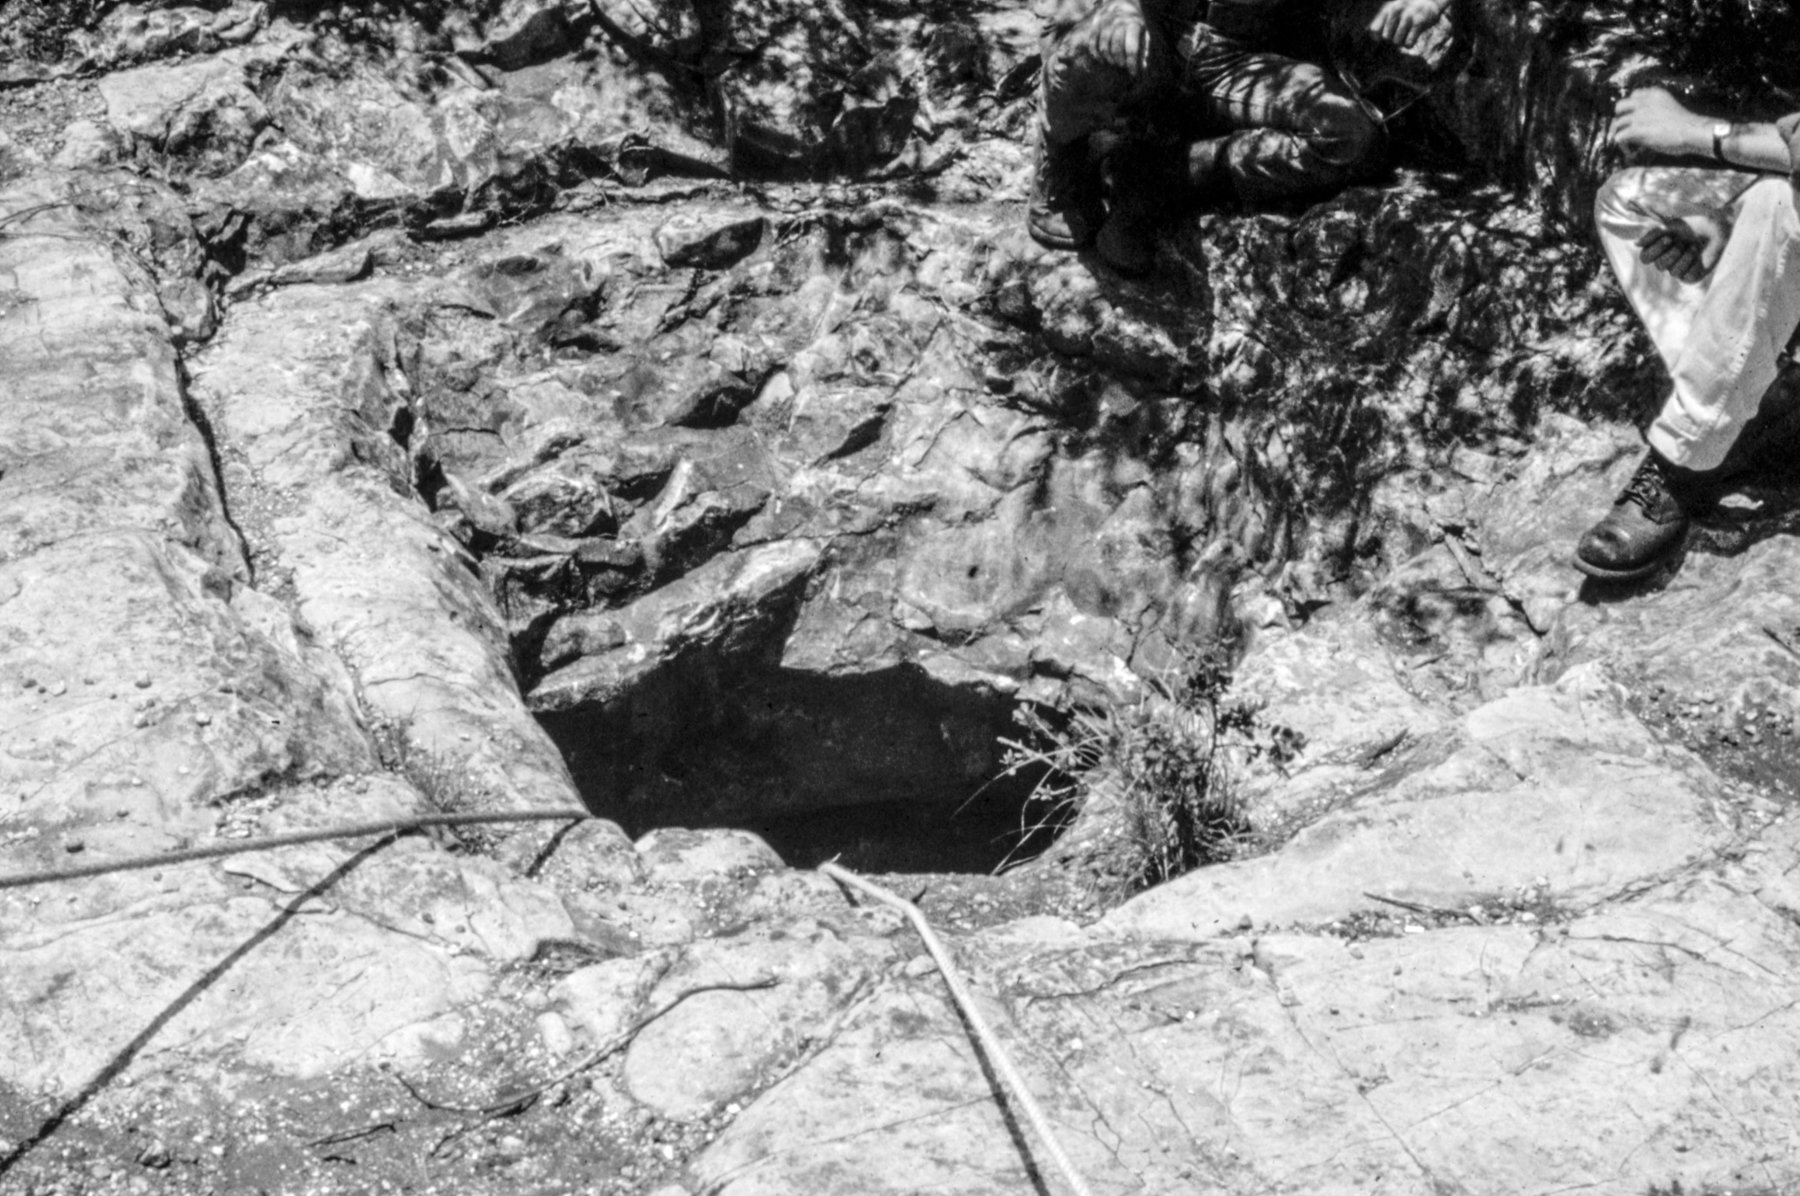
The cave, or the hole in the ground, you find in the wilderness is lurking death to the untrained person and should never be entered with out an experienced cave explorer. Here in Texas, for example, most caves are home to the rattlesnake, and even if a snake is not seen, they are there in the twilight zone.
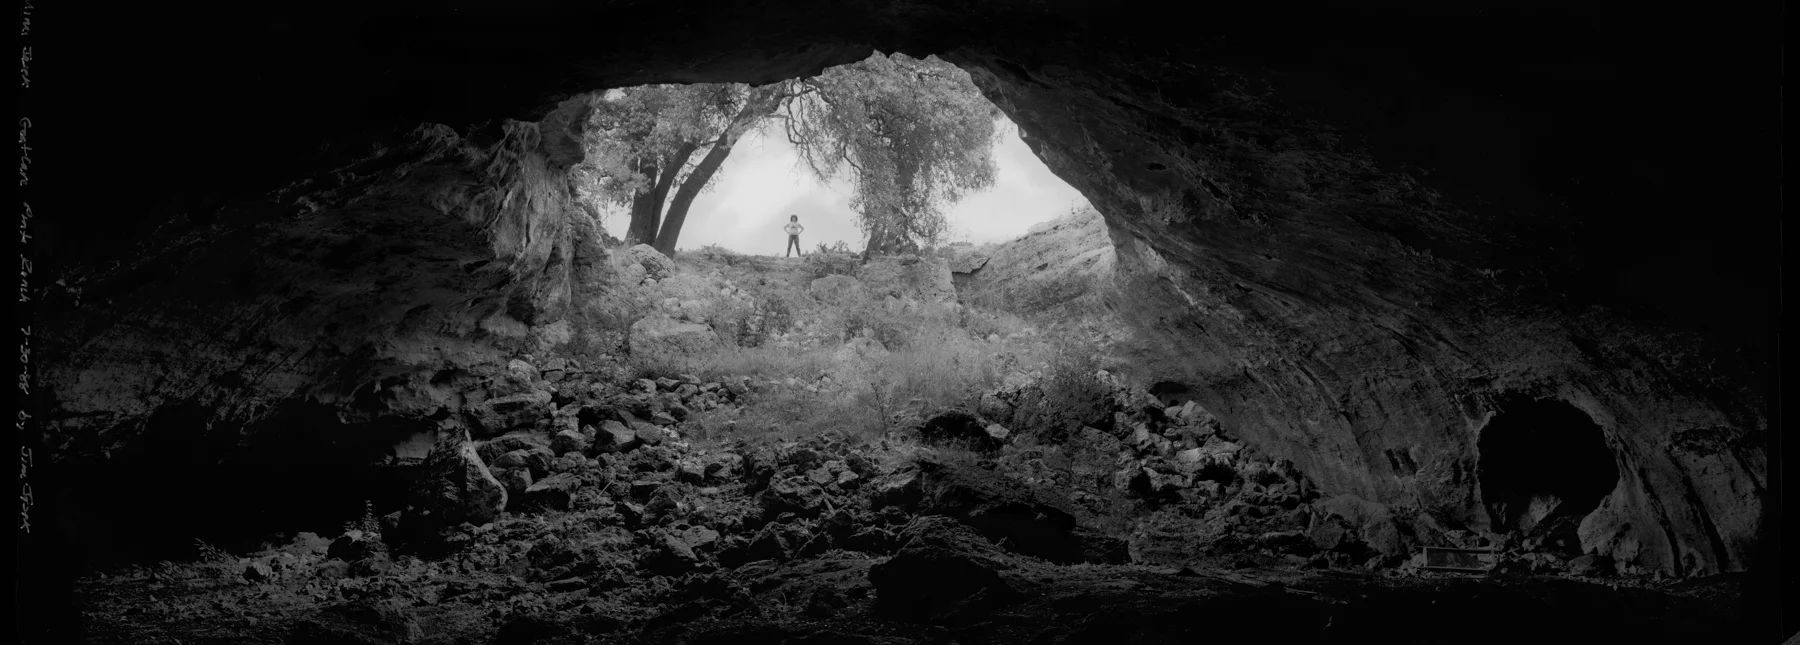
The pictures you see of large rooms inside a cave is not reality. Most caves are small and require a lot of belly crawling and squeezing into narrow openings. Many caves require rope and technical skills to enter and exit the cave. Technical skill are needed to climb up, down, over and under large boulders and must be done so no one on the trip is injured or worse yet killed. The NSS is a friendly organization and they will put you in contact with cavers who will be happy to work with you. This said let’s get into cave photography.
Since caves are cloaked in total darkness, photography is done with artificial lighting using flashbulbs, electronic flash, and the powerful LED’s such as the video lighting.. The camera equipment is the same equipment you use for day to day photography. I will discuss some equipment and techniques in the following article.
Today the use of the digital cameras and software like Photoshop and Lightroom has simplified cave photography, but this article is about the use of film. The techniques of using film easily transfers over to digital.
Let’s start with equipment. If your interest is visiting the commercial caves then just about any camera depends on your own personal choice. Most commercial caves welcome the photographer.
Since a commercial cave is a business, they might have rules on the use of photography used for commercial usage. It is always a good idea to ask if the photography taken in cave can be used for profit. While commercial caves do welcome photographers they have might have restrictions on the use of a tripod and extra lighting. Be on the safe side and ask. Some commercial caves offer photography tours.
If your interest is exploring wild caves and cave photography then it is a totally different endeavor. I suggests the 35mm camera, with interchangeable lenses, and chose a camera easy for you to focus in very low light. The next step is to protect your valuable camera.
The environment inside the cave can be very harsh. Caves are humid, wet, and very muddy. Depending on the part of the country where the cave is located, and the deeper underground, the cave can be very cold requiring wearing a wet suit to prevent hypothermia.
Picture yourself standing in a mud puddle in a rain storm and operating your camera gives you an idea what cave photography is all about. The Pelican Camera case is the best all around camera case for caving and for any outdoor adventure. The case is crush resistant, water and mud proof, and made in a number of sizes so you can customize the case to your camera gear.

I use several different sizes of camera cases for caving. If the cave is not a water cave, I use a Zero Halliburton Aluminium case that is not water proof in any way. I am careful to never set the case in a pool of water. If the cave is a water cave, then the Pelican Case is the only choice. On the other hand, if the cave is dry and mostly walking, one of the Tamrac Backpacks is perfect, but be forewarned: the cloth bag will get really dirty and trashed out. What I am trying to impress upon you is that there is not a single camera case for all caves, but the Pelican comes the closest. I fit the camera case to the cave. A very heavy bulk camera case will be super difficult to handle crawling in one foot high passages.
As a side note, since caving in very hard on your equipment and there is the risk of damage, I suggest special camera insurance. Contact your insurance agent and ask for a Camer Floater Policy. This insurance is scheduled insurance listing the replacement cost of each item. If you drop the camera down a pit, into a crack, or in water, the insurance replaces the full value with no deductible. The cost is usually around $2.00 per $100 value. A thousand dollars of insurance is $20. Very affordable peace of mind. Tell the agent what you want and be sure there is no deductible..

The Zero Halliburton Aluminum camera case is light weight, super strong, easy to carry, and takes the abuse of banging the box against the cave walls and pushing or pulling the box in tight passages. I attached a shoulder strap to make it easier to carry. I also replaced the folding handle with a large screen door handle. The down side to the Zero Box is the cost.
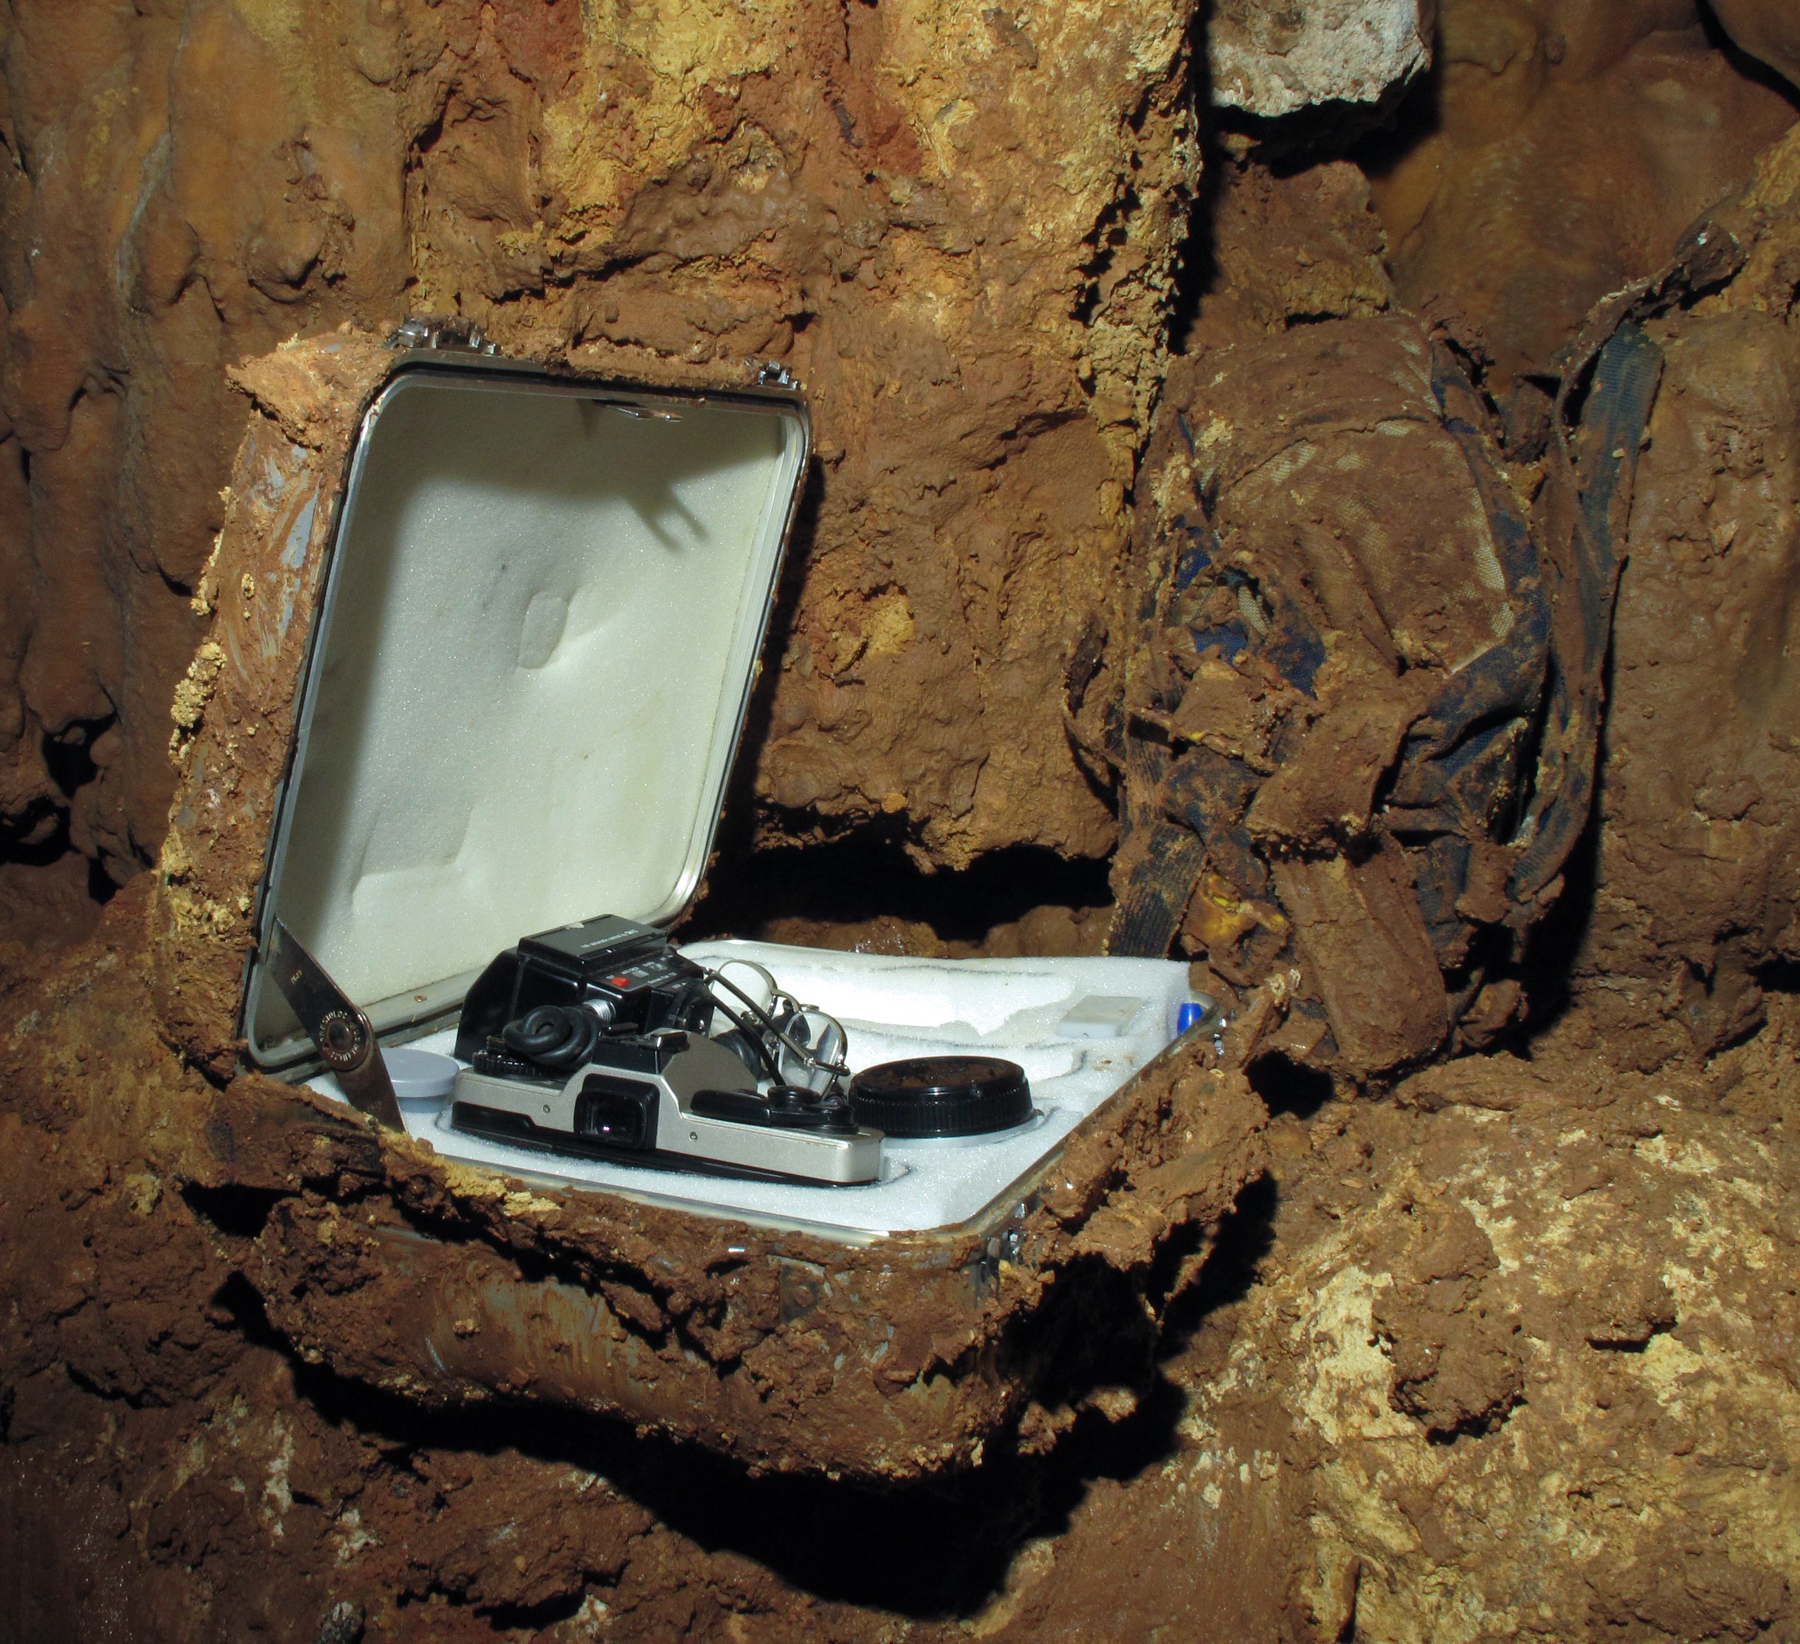
I have used the Zero Halliburton aluminum case for over 30 years and never had a damaged camera. The box does have a rubber ring between the case and the lid but it is not water tight. The box is mud proof as you can see. This particular cave is muddier than you can even begin to imagine. Notice the blue cave pack in the background.
Over the years I have developed a technique to keep the mud out and use clean hands to handle my cameras. I rarely get a speck of mud on my camera. I use rubber glove to keep my hands clean. I open the box with my muddy glove, then remove the gloves and handle the camera with clean hands. Then put the camera back in the case, put on the rubber gloves and close and lock the case
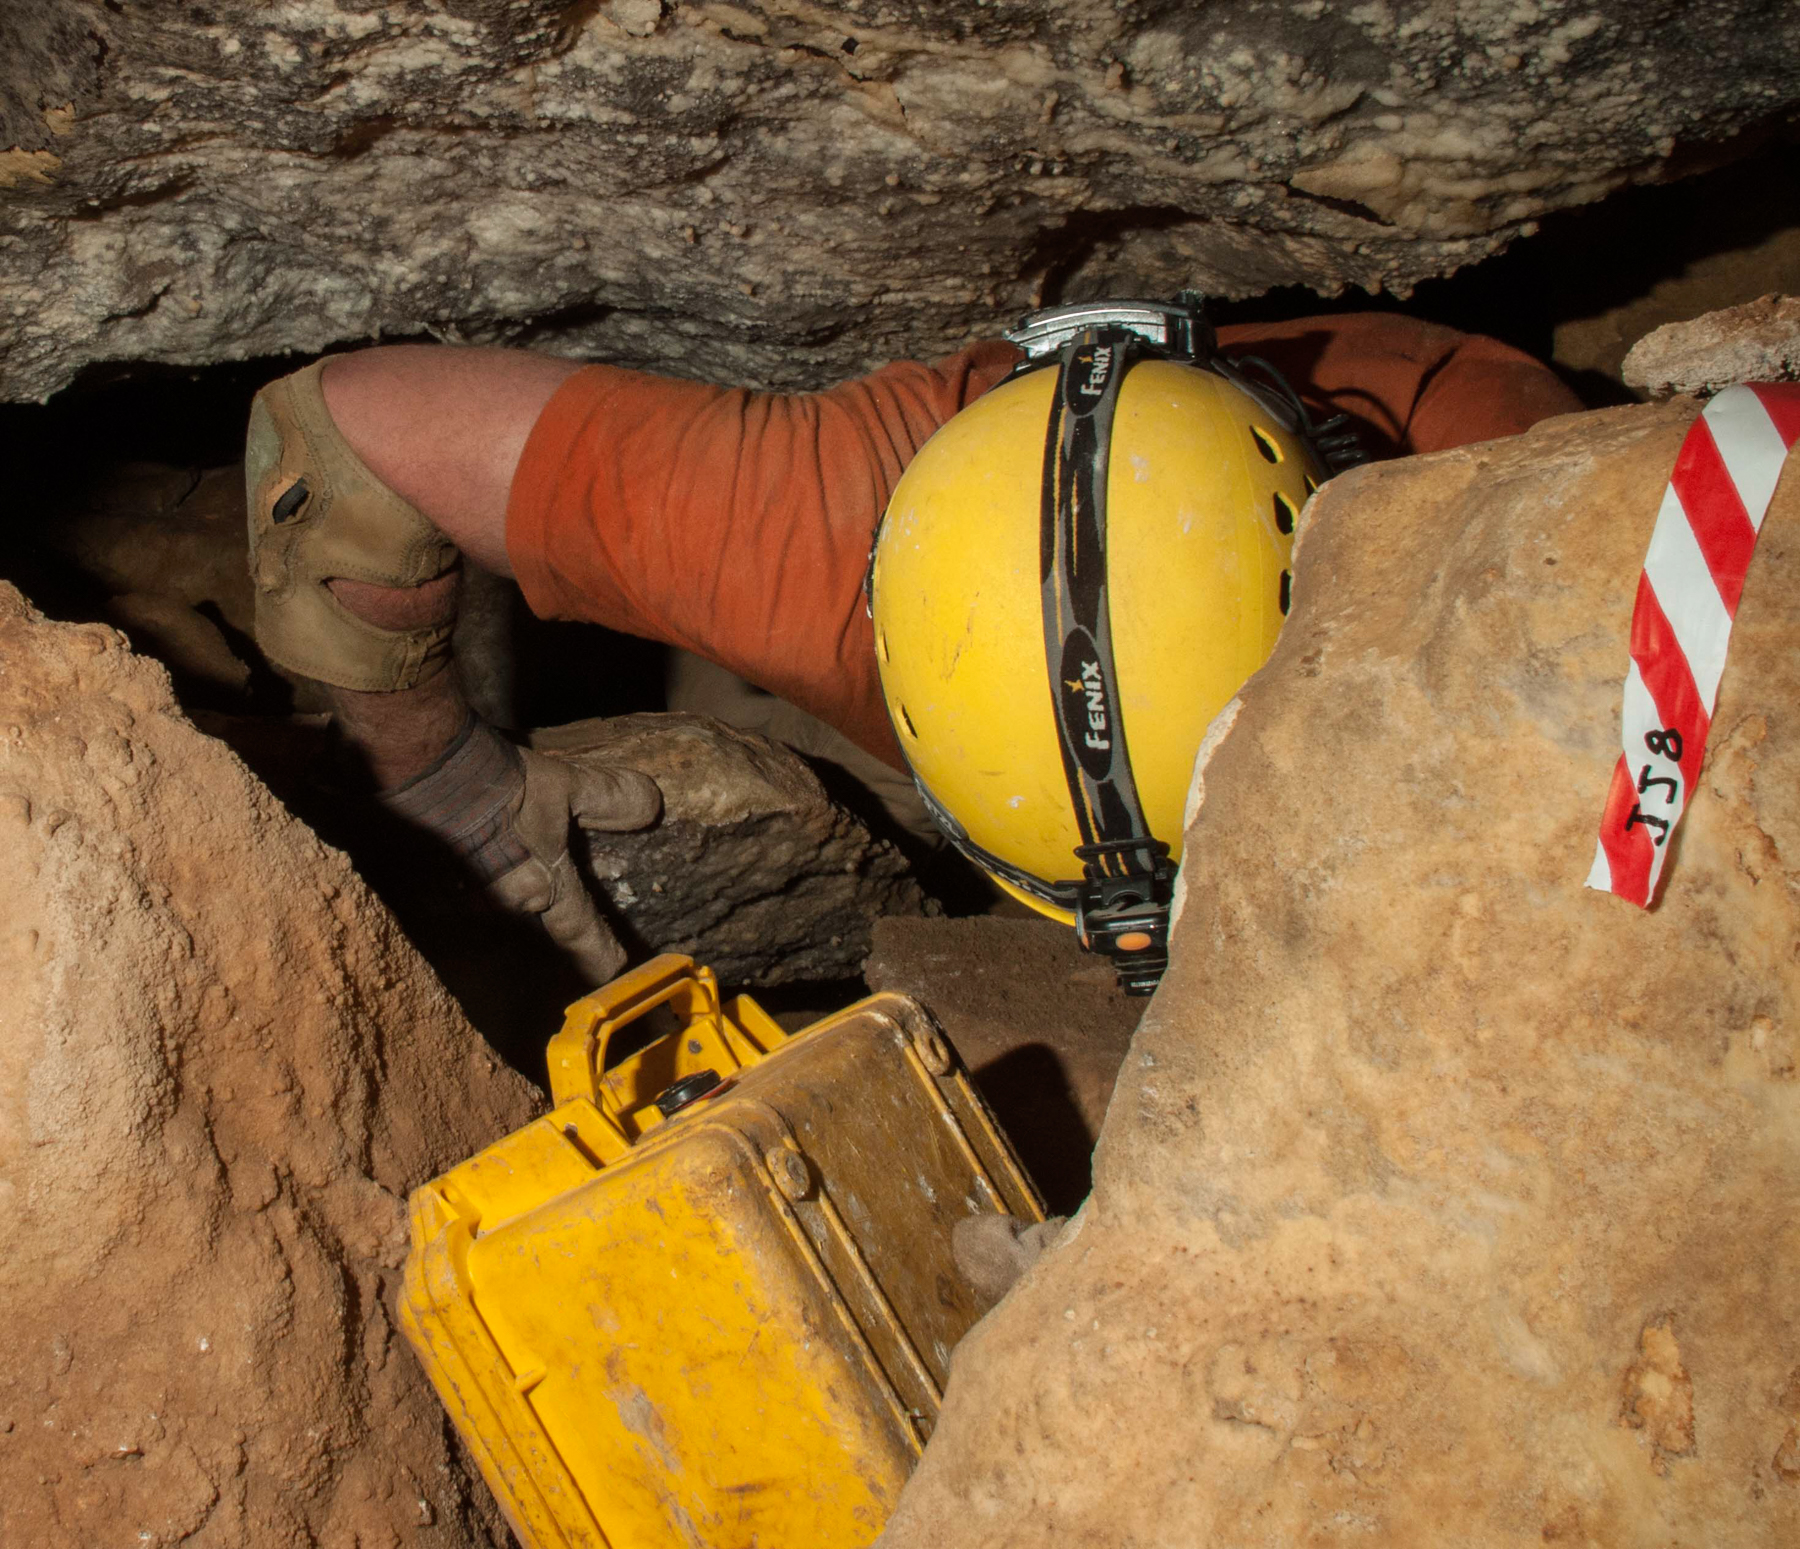
An example of using a larger Pelican camera case in a breakdown passage. The JJ8 is a cave survey marker.It is easy to see how a large heavy box is difficult to handle.

The Pelican Case comes in many sizes, This case is just large enough to fit my small camera and a strobe. I have the box attached to my belt so I am able to travel to different parts of cave with the case hanging on my belt leaving my hands free for climbing and caving.

The Tamrac Camera back pack is a good light weight method of carrying any camera underground. The pack does get very dirty but can be hosed off after the trip. As long as the cave is dry and not super wet such (not a water cave where swimming is involved), then the Tamrac is a good bag. The choice of a camera pack for case it up to you, and will be easier with experience and talking to the other cave photographers. A caver might have a case you can borrow to get you started.
The next critical piece of equipment is the tripod as you will use it for almost every photograph. There are hundreds of tripods to choose from. Since the tripod is a must have, choose one that is light weight and collapses down to at least 15 inches but will extend to up to 30 inches. Find one where the legs of the tripod will extend out allowing leg placement at any angle. Tripods are expensive so choose carefully. I have been considering purchasing the following tripod: Dolica TX570B150SL Ultra Compact Tripod with Professional Ball Head, for caving and outdoors. You will also need a bag to carry the tripod in to keep it from becoming a mud ball. Attach a strap to the tripod bag so you can carry it over your shoulder. The tripod is a necessary evil. so find one that is light weight, sets up fast, and it easy to carry.
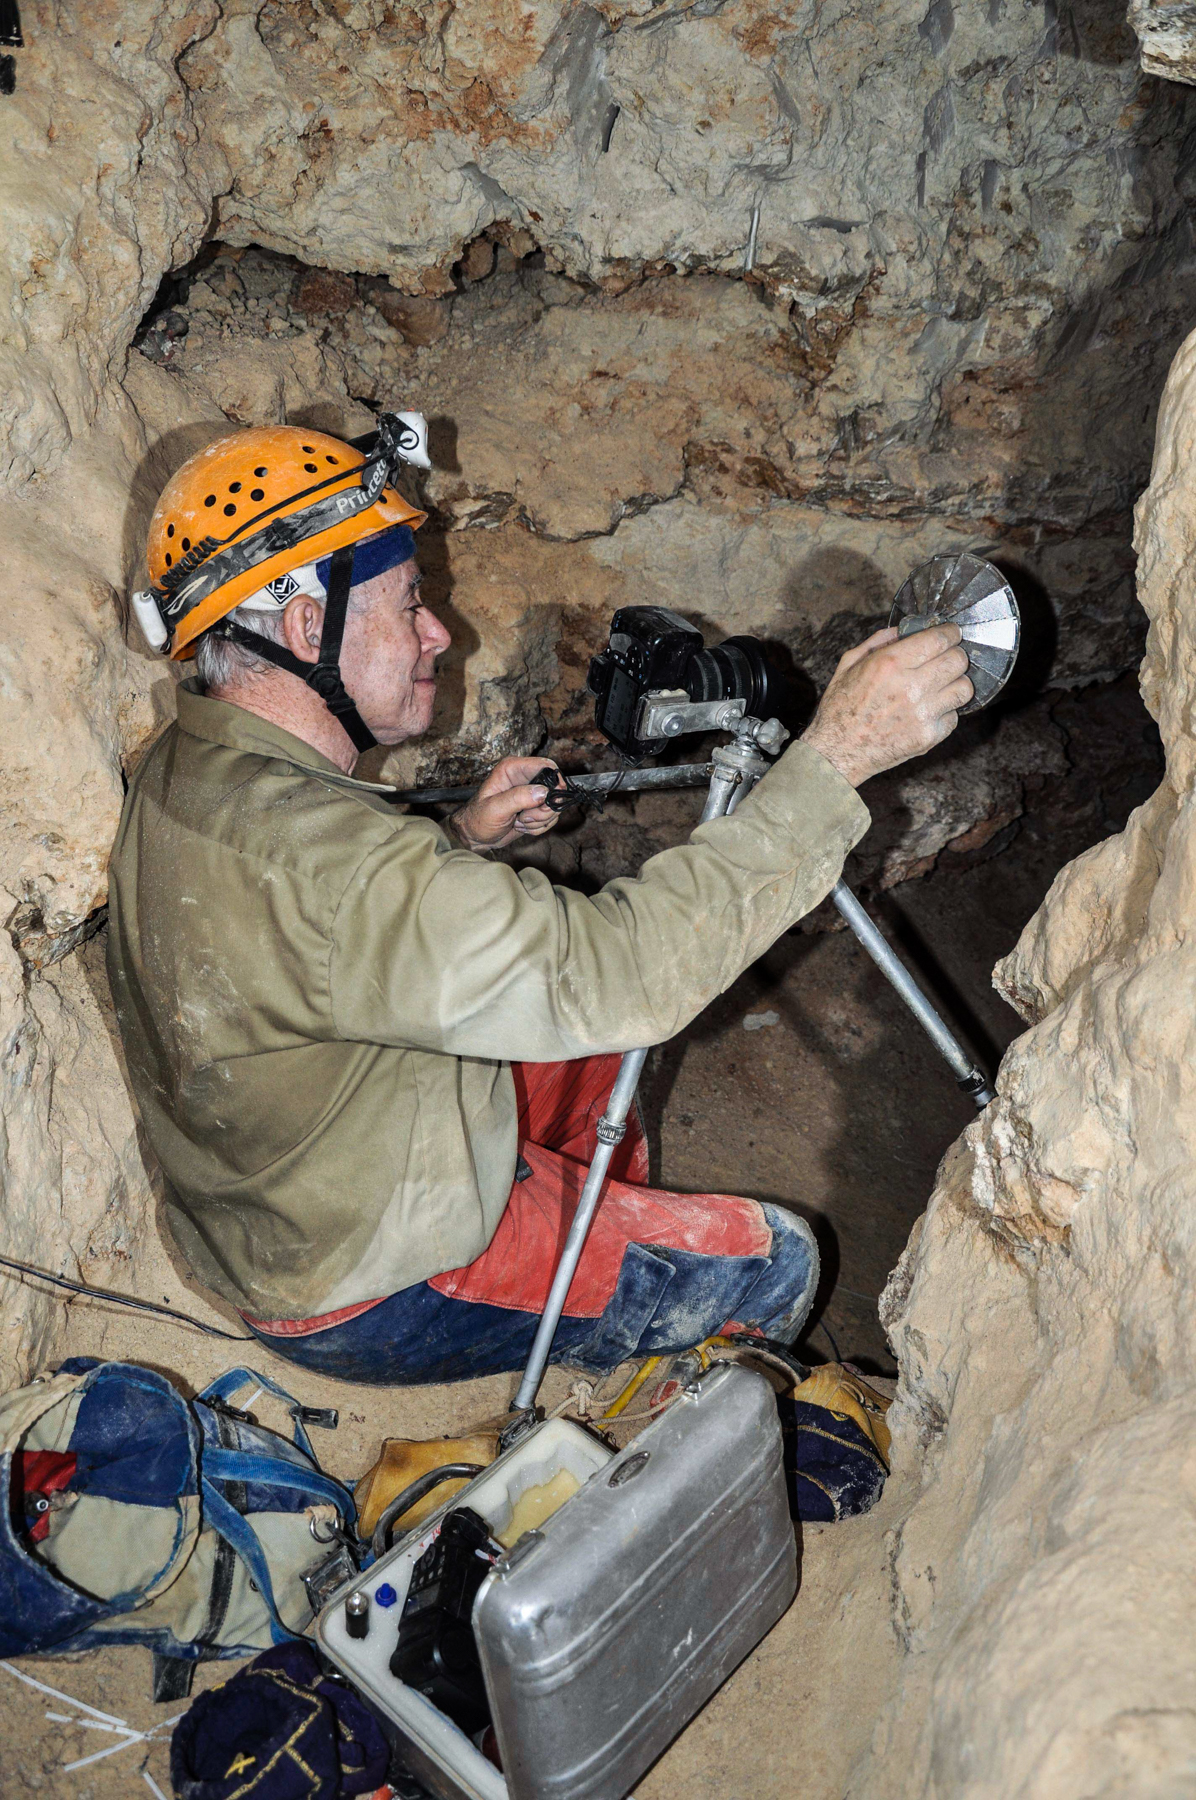
An example of a set up for a cave photo. The tripod is a 40 year old Weekend Gitzo with the legs set at different angles. Since the cave is dry the aluminum camera case is suitable. I am using flash bulb to set off several additional flashes by remote light triggered slaves.
Stay tuned for part two of Cave Photography: Making the Exposure!
Connect
Film enthusiast James Jasek resides in Texas, where he goes underground every chance he gets.